16,000 woodworking plans inside...(2 days left)
I just discovered this and suggest you see this immediately...
BHC 14 INEXPENSIVE TREE STAND PDF Plans build your own tree stand Woodworking Download.

Click Here To Download
In early December we were ready to start our bathroom remodel after saving and planning for months. It's hard to believe that the smallest room in the house could take so long to remodel, but I'm glad we took our time and scrutinized every single decision and detail. Taking a room down to the studs and starting over is overwhelming! You'd think that having a fresh palate to start with would make things easier by allowing you to do whatever you want - but sometimes too many choices can be burden. Paralysis by analysis.
In many regards, we were lucky with this room remodel because I was adamant that the bathroom must reflect the character and age of our home. Since our house was built in 1939 and looks like a cottage on the exterior, I chose as many features as I could that would make the bathroom feel original to the home, but clean and fresh. I'll touch more on those design decisions as we work through the photos.
But first, the BEFORE:

Having lived with the old bathroom for over 7 years, we gained plenty of insight about what changes needed to happen in here.
1. The vanity. Lots of things not working with this vanity style. It was too low, too wide and too deep for the space. There was less than two inches between the vanity and the toilet tank, which made it a pretty tight squeeze back in that corner. Brent is 6'4" tall, so trying to shave using this sink was uncomfortable. And finally, this bathroom is way too narrow to have a 24" deep vanity.
2. Storage. The medicine cabinet also felt like this huge beast affixed to the wall which made the room feel even more cramped than it already was. And forget about a place to put towels! The linen closet is outside the bathroom door, so if you forgot to grab a towel before your shower you'd have to skitter out naked to the linen closet. #hopetheblindsareclosed

2. The wall texture. There was a thick and rough texture applied to the walls that would actually hurt if you accidently rubbed against it. I doubt that was original to the room, probably was added at some point to cover problems with the plaster walls as an easy fix. Unfortunately, there was really no way to scrape it off, so pulling all the old plaster off and putting up new sheetrock was really the only way to go.

3. The lighting. There was just the one vanity light in the room which just wasn't bright enough.

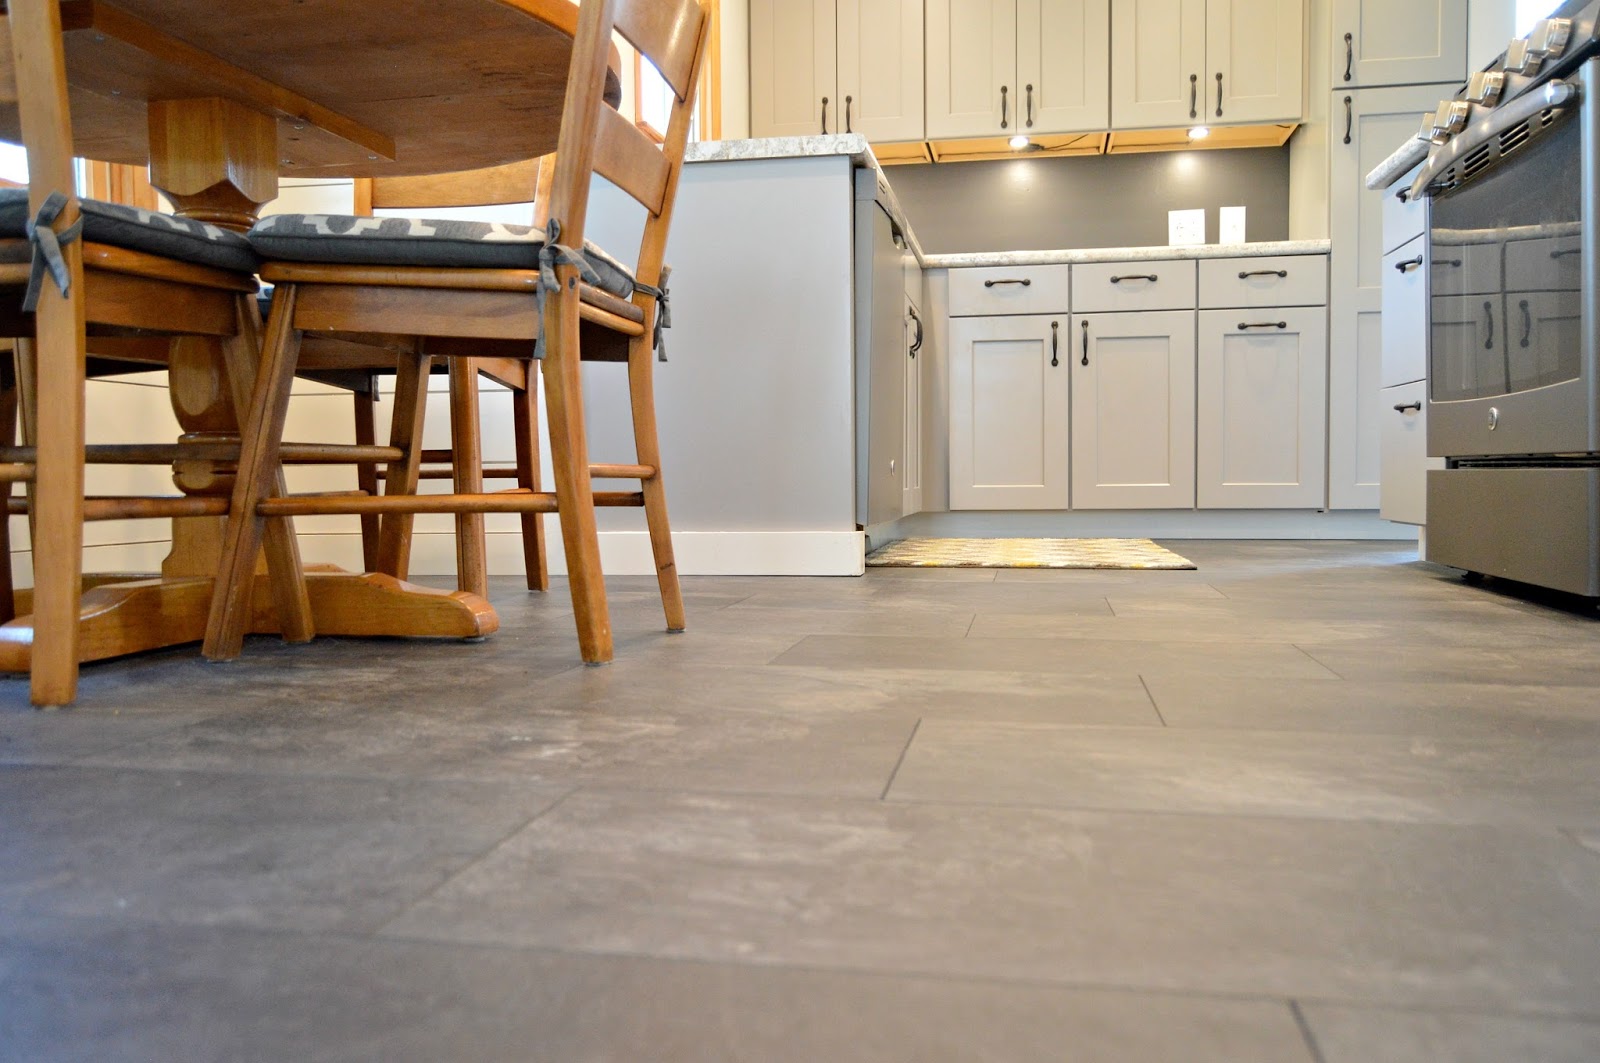
4. The floor. Grout was missing in lots of places and the flooring had a blue tone to it.

5. The cast iron tub. This was an amazing tub and we considered salvaging it but the cost to have the porcelain refinished was almost the same price to buy a new cast iron tub. The original bathroom did not have a shower, so at some point, someone added one but didn't have the plumbing added behind the wall, so that was important to us to add a legit shower to this bathtub.

And with a breath of fresh air, we are so happy to share the AFTER photos! Come on in and have a look around...all sources will be linked at the bottom of the post.

What a difference, huh!!?? The shallower pedestal sink takes up so much less floor space and allows the room to flow.

We removed the overhead vanity light and flanked the mirror with sconces to soften the lighting. I chose two different fixture finishes in the room. Oil rubbed bronze fixtures for the lighting and polished chrome for the faucets and towel bars. We got pretty lucky with these sconces from Lowes - only paid $10 each for them. Thank you for being on clearance!

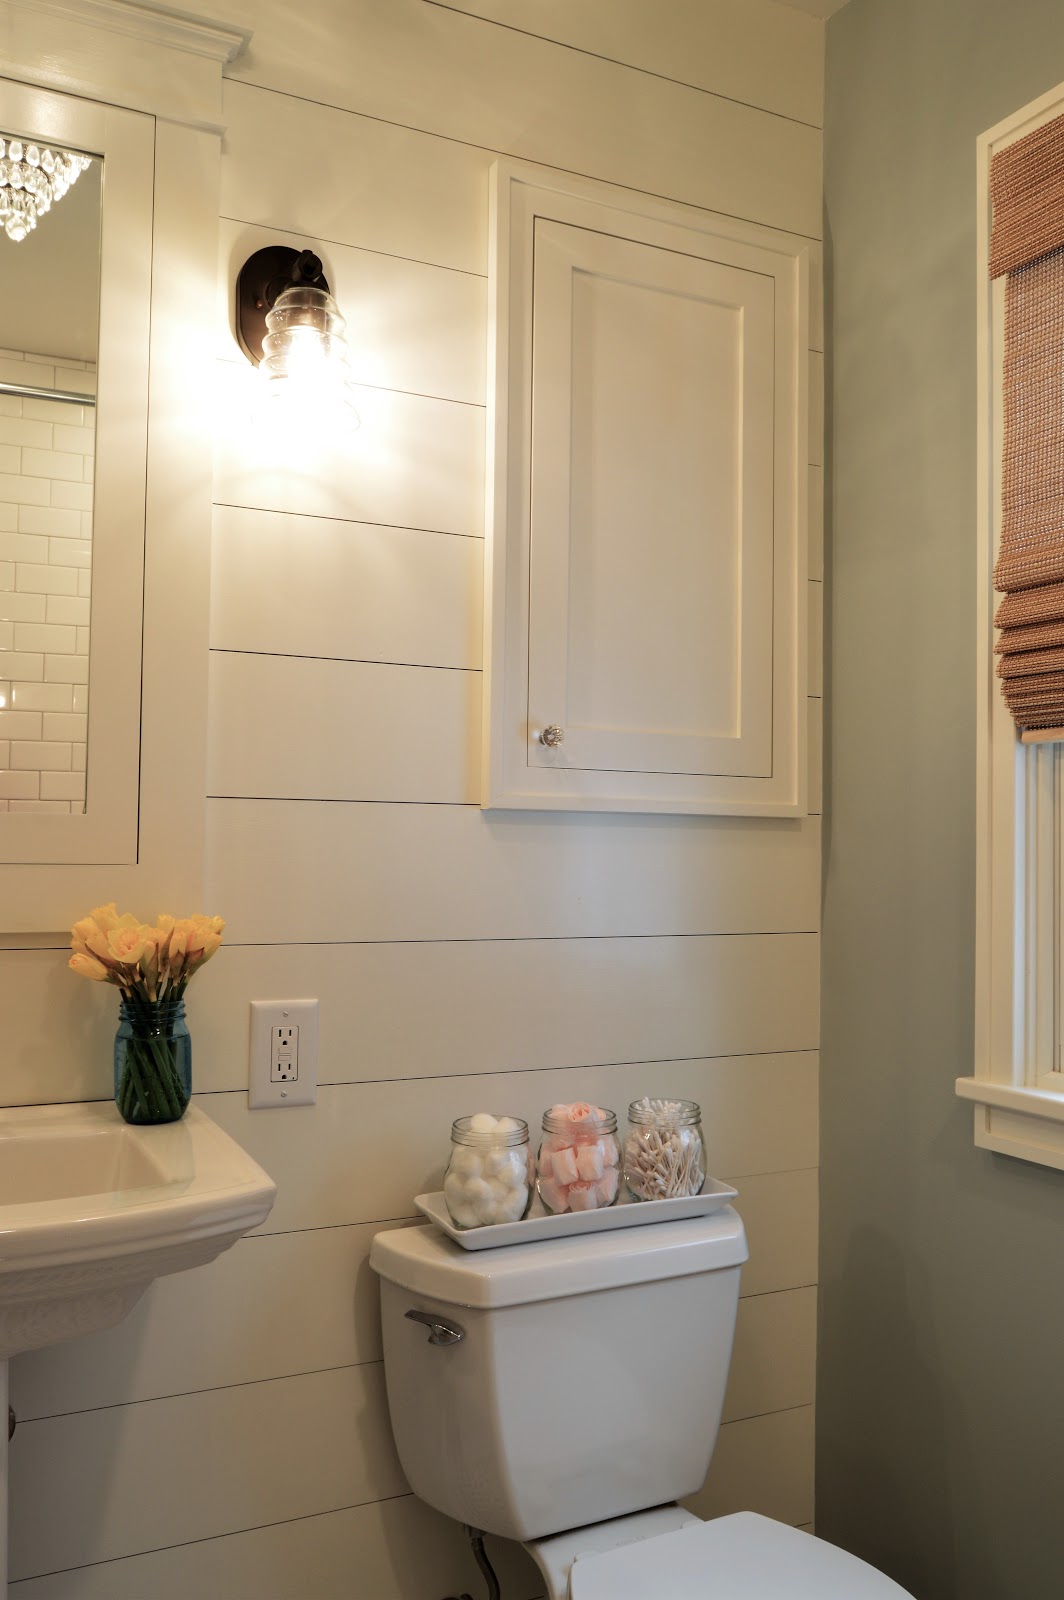
As you scroll through these pictures, keep this one little thing in mind. Brent MADE all of the woodwork in this bathroom. And I don't mean he bought it off the shelf and cut it to fit, I mean he MADE it. Still blows my mind. For example, when we were looking at base trim options, they were all too skinny and I wanted something thicker and more substantial. So my dad and I went to a construction supply store in Sioux Falls (Stan Houston for you locals) and I chose a router bit with the trim profile I liked. Brent used that to mill the base trim. For the door and wall cabinet trim, he made what they call a step trim, which is a solid piece wrapped in an L shaped piece to create a profile. The shiplap is poplar and Brent cut a tongue and groove in it for a few reasons. It eliminated any nail holes on the face of the boards because you nail into the joints. That was a huge relief to me that I wasn't going to have to fill a thousand nail holes! And we also were aware that a bathroom is a high moisture area so the tongue and groove should prevent moisture from sneaking behind the wood. In summary, Brent is awesome and I'm always impressed by his ability and more importantly attitude about approaching new projects that challenge him!

I think the toilet was the one thing we could salvage from the original bathroom, since we had just replaced it a few years ago.
Ahhhh...our new shower! Subway tile was an easy choice here since it feels classic to the style of our house. I chose a light gray grout because white would probably not stay clean based on my ability to forget to clean things. We tiled all the way to the ceiling but you can't see that in the photo because it is really difficult to photograph such a tiny room!

And lets talk about this tub. First off, I was absolutely positive that we needed to replace the old cast iron tub with a new cast iron tub. I love how they keep bath water hot forever, they feel so substantial and sturdy and the porcelain practically shines! The bad news is that there must not be a big market for cast iron tubs, probably because they are so heavy. This one weighs 300 lbs and it took four of us to carry it into the house. The other tricky part is that we only wanted a 30" wide tub to leave as much floor space as possible in the bathroom. That meant there were really only 2 models of Kohler cast iron tubs to choose from. The only downside is that it isn't quite as deep as our old one but I do like that it is very easy to step over the side in order to shower. That's important for us as our kids use this bathroom and it makes it easier for them.
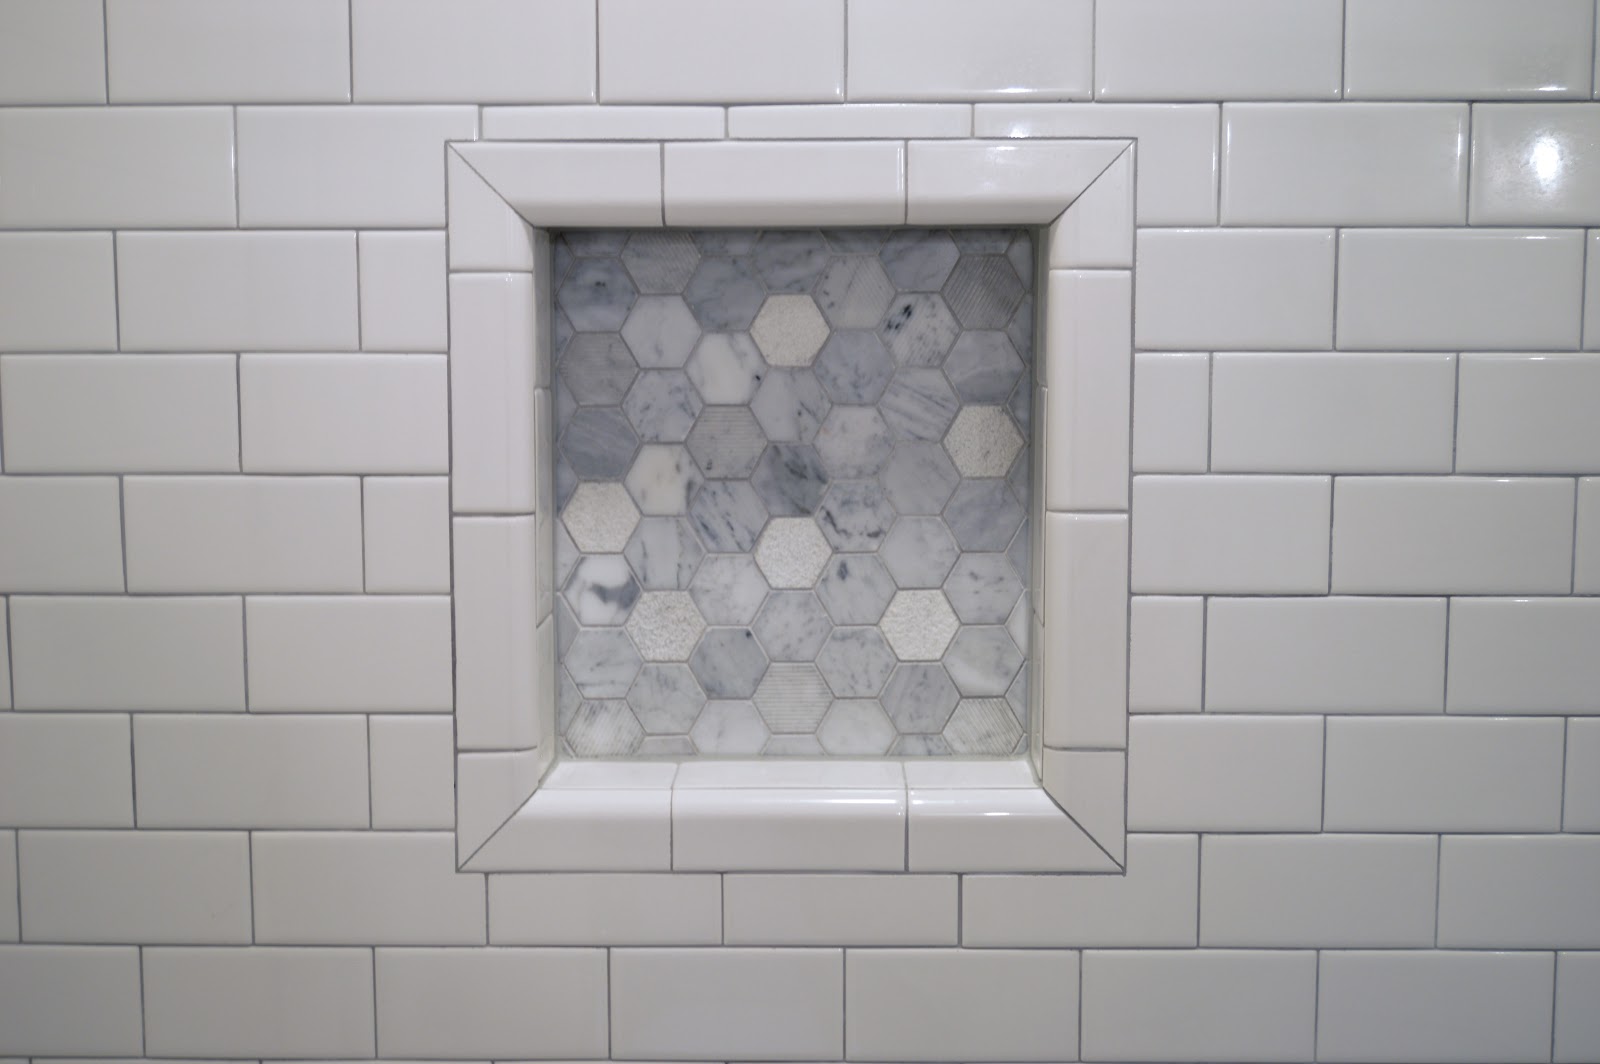
We added this shower niche to hold our bath products. And funny story, we sized it to fit the large Costco bottles of shampoo, conditioner and body wash since that's basically all we use. An important note about installing subway tile. When we bought this tile, we couldn't figure out if we were supposed to just butt the tiles together or if we were supposed to use small spacers. The tile dipped at each of the edges, creating a groove, so we took that to mean that we didn't need to use spacers. When we installed them, we kept them tight together without spacers - this made a 1/16" grout space. If you want a thicker, more substantial grout line, you CAN use spacers. We are glad we went the route we did because we wanted minimal grout lines.

We are keeping all of the original doors in the house. I took this one down to sand it and put a few fresh coats of paint on it. The hinges were covered in old paint from previous paint jobs so I put the hardware in an old crockpot with some dish soap and cooked the paint off. I'm actually strangely excited to do that to the rest of the hinges in the house now. Pretty gratifying to peel all those old layers of paint off of the metal.
Something else to note here since you can see so much of the new drywall. We did something here that we've never done before - we DIDN'T TEXTURE THE WALLS OR CEILING! I think in other parts of the country, specifically the Northeast, it's very common to not apply texture. We decided to go this route because the rest of our main floor is plaster with only a very light texture on it and we wanted to match that as best as we could. This meant Brent had to be absolutely perfect with his sheet rocking and taping which meant some extra time spent on those steps. We love how the walls and ceiling feel so soft without the added texture. And bonus, if we ever ding up a wall, super easy to patch!!

Storage was a major problem in the old bathroom, so to combat that, we designed three cabinets to be recessed into the walls. Brent of course made all of the cabinetry. We ordered a custom sized mirror from a local company to fit the medicine cabinet frame.

We have a linen closet in the hallway just outside the bathroom door. We contemplated closing off the linen closet from the hallway side and simply making a door to it in the bathroom, but that would be weird to have to go into the bathroom to get cleaning supplies and sheets. So we built this cabinet to open into that linen closet to allow you to grab towels out of the closet but from within the bathroom. Life changer. Just below the linen cabinet is our laundry chute. There was no way we were taking that out!

This is inside the medicine cabinet. Tons of storage in here! And if you look closely, you can see that we have lost the lid to our toothpaste. The shelves are all adjustable.

We got lucky with this cabinet above the toilet as it could be deeper than the medicine cabinet because of the framing. All of the doors have soft close hinges so the kids can't bang the doors shut. Even where we placed that outlet was an intentional decision. I'm telling you, when you have such a small space you have to consider every choice to maximize efficiency. Down the road, I figured our daughter, or whoever may be living here, would use that outlet to plug in a curling iron or hair dryer. But since we chose a sink with a smaller ledge, they would need a place to set these hot items as they warmed up. I figured they could plug it into that outlet and set it on the top of the toilet tank as it heats.


Here's a close up of Brent's trim that he made - door trim, base trim and shiplap. If I can remember correctly, I think we used quarters to space our shiplap.

And while we're here, lets talk about this floor! It is a marble basket weave tile from Lowe's. Kind of spendy but when you are remodeling a small space you can go for higher quality finishes because you simply don't have to buy that much of it. We used a charcoal gray grout to make it easier to *appear* clean. I love how the light bounces off of it. This tile felt like an easy choice in the bathroom since it seemed to match the house and the bathtub and the pedestal sink.

Finding the right pedestal sink took some time. We needed on as narrow and shallow as possible but one that still had a ledge around it to set items as you get ready for the day. I could already imagine my frustration if I had a sink without a ledge (big problem with many pedestal sinks) and all of my stuff kept falling into the bowl. We found this one for $200 at the home improvement store and are very happy with it so far! Plumbing a pedestal sink can be extremely difficult - just ask Brent :)

Hopefully we all get wiser as we age, and something small but important I've learned is to have faucets with only one handle. It's too tricky and time consuming to get water temperatures just right when you're messing with a hot and cold handles. One handle also seems to keep more of the water drips from your hands over the bowl of the sink instead of on the surface of the countertop.

In such a small space, lighting is critical and it must come from several sources. We have the wall sconces, an overhead light, a very bright shower light incorporated into the shower fan and natural light. For the overhead light, we went fancy! I've had my eye on this small chandelier from Lowes for sometime and this was the perfect space to use it in.


The window shade was an $8 find from the clearance section at Home Depot. That's a new double hung Anderson window as well.

Almost done! Since this is a family bathroom, it was important to us that it work for everyone. Owen, our 7 year old, is just a little too short to see into the mirror. Brent built him a small stepstool out of rustic oak.

The best part?? It opens up to also double as our small bathroom trash can! We have a cockapoo named Lily, so having an open trash receptacle in the bathroom is a terrible idea. Since we want this bathroom to feel as open and airy as possible, filling the floor with a stepstool and a trash can didn't make sense to me - so why not combine the two!

Source List