16,000 woodworking plans inside...(2 days left)
I just discovered this and suggest you see this immediately...
BHC 14 INEXPENSIVE TREE STAND PDF Plans build your own tree stand Woodworking Download.
Click Here To Download
My parents have an adorable little shed in their yard to store swimming pool equipment in. Mom asked us to build her a few flower boxes for it. Since we are always looking for ways to create things out of materials we already own, we figured this would be a perfect project to build from our barnwood pile. The flower boxes would be essentially free and they would add a ton of character to the shed.
We chose a few pieces that were the same width and thickness, pulled old rusty nails out and cut the ends off to start with a square piece. Brent informed me that every good carpenter knows to square up the ends before starting anything. News to me!
We began by measuring the sides, which for our 18" flower box liner, that meant our sides were 7 3/8 wide.
The front and back were measured and cut next at 20" inches each.
Safety first. Brent is a stickler for protective gear...
This is why my dad told me woodworking and flip flops don't mix.
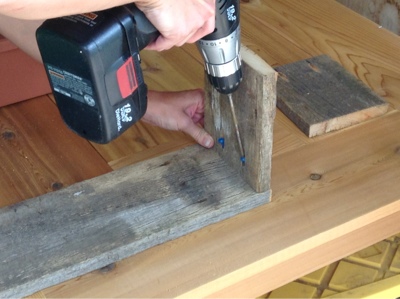
We use a Kreg jig to build things that we don't want screws to show, so we drilled the holes we needed.
After our holes were drilled, we use special Kreg screws to attach everything together.
For the bottom, we centered a piece to allow for drainage on the sides.
We purchased a few 18" flower box liners that just drop in. Here is what my parents shed looked like before.
Brent added blocking on the interior to support the boxes without having to use brackets.
And here is the finished product...
We thought the barnwood tied in great with the cedar shingles. Actually, Brent didn't really care :)
Total cost of these flower boxes: $14.00